Multiple Choice
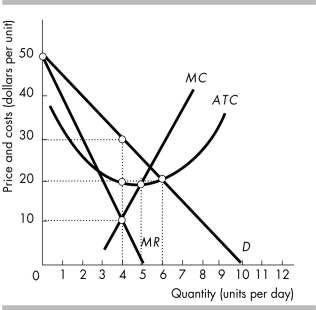
-For the single-price monopoly shown in the figure above, the deadweight loss is
A) zero.
B) between $0 and $10.
C) between $10.01 and $20.
D) more than $20.01.
Correct Answer:
Verified
Related Questions
-For the single-price monopoly shown in the figure above, the deadweight loss is
A) zero.
B) between $0 and $10.
C) between $10.01 and $20.
D) more than $20.01.
Correct Answer:
Verified

